Looking to fit your new electric towel rail yourself? Then look no further! With the help of our resident DIY expert, Craig Phillips, we’ve put together a handy guide on how to install an electric towel radiator from Bathroom Mountain. Here’s how:
Tools For The Job:
- Spirit levels
- Rubber mallet
- Grips or adjustable spanners
- Tape measure
- Cordless drill
- Screwdrivers
- Detector
- PTFE Tape
- Four wall brackets (comes in packaging)
- Two blanking plugs (comes in packaging)
- Air vent (comes in packaging)
- Fixing that come in your packaging
- Drill bit
- Inhibitor
- Water
- Funnel
- Towel rail
- Heating element
1 – Preparing Your Towel Rail
In each corner of your towel rail, you should find some bung pieces in place. Pop these out before you begin.
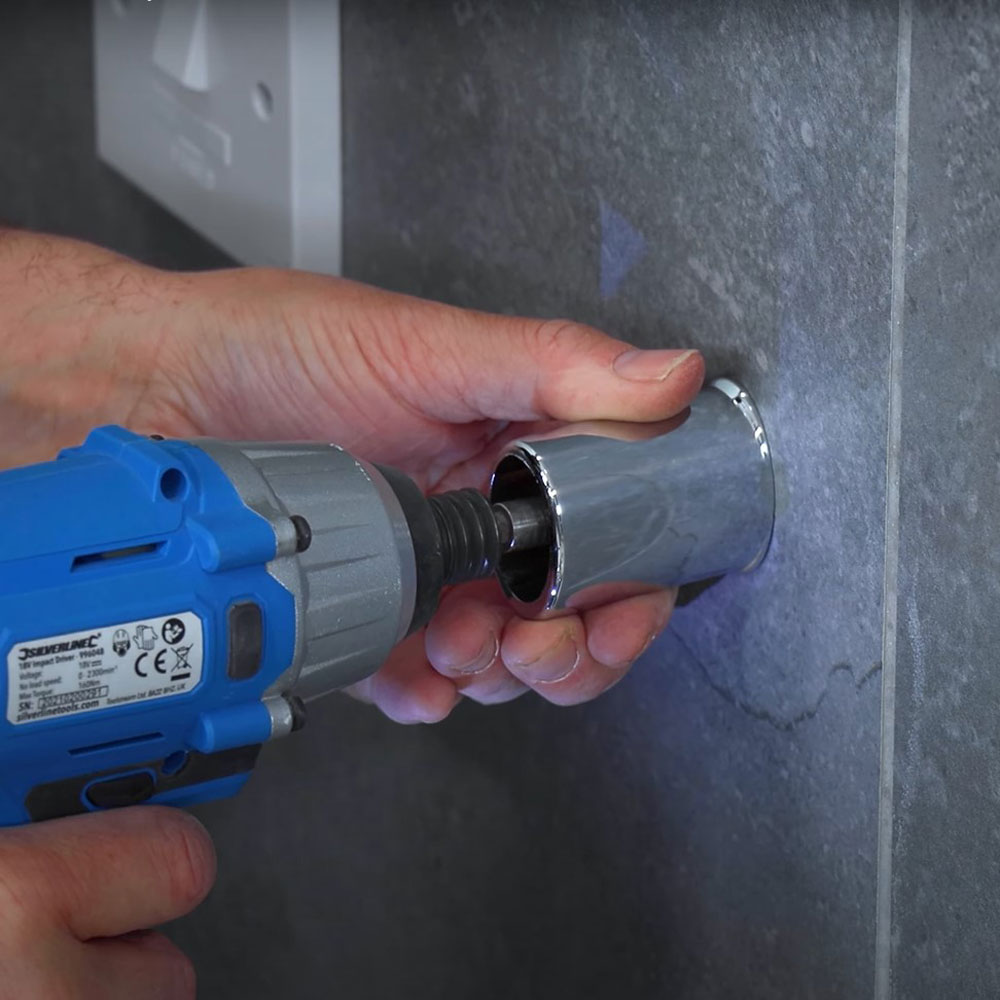
Take one of your blanking plugs and the air vent piece. Before fitting these, take some PTFE tape and apply it to the threads of each of the components. Start by fitting the blanking plug in one side where you want the top of your towel rail to be. On the other side, fit the air vent. Tighten these by hand, and when you’ve tightened them as far as you can, tighten them even further using grips or an adjustable spanner.
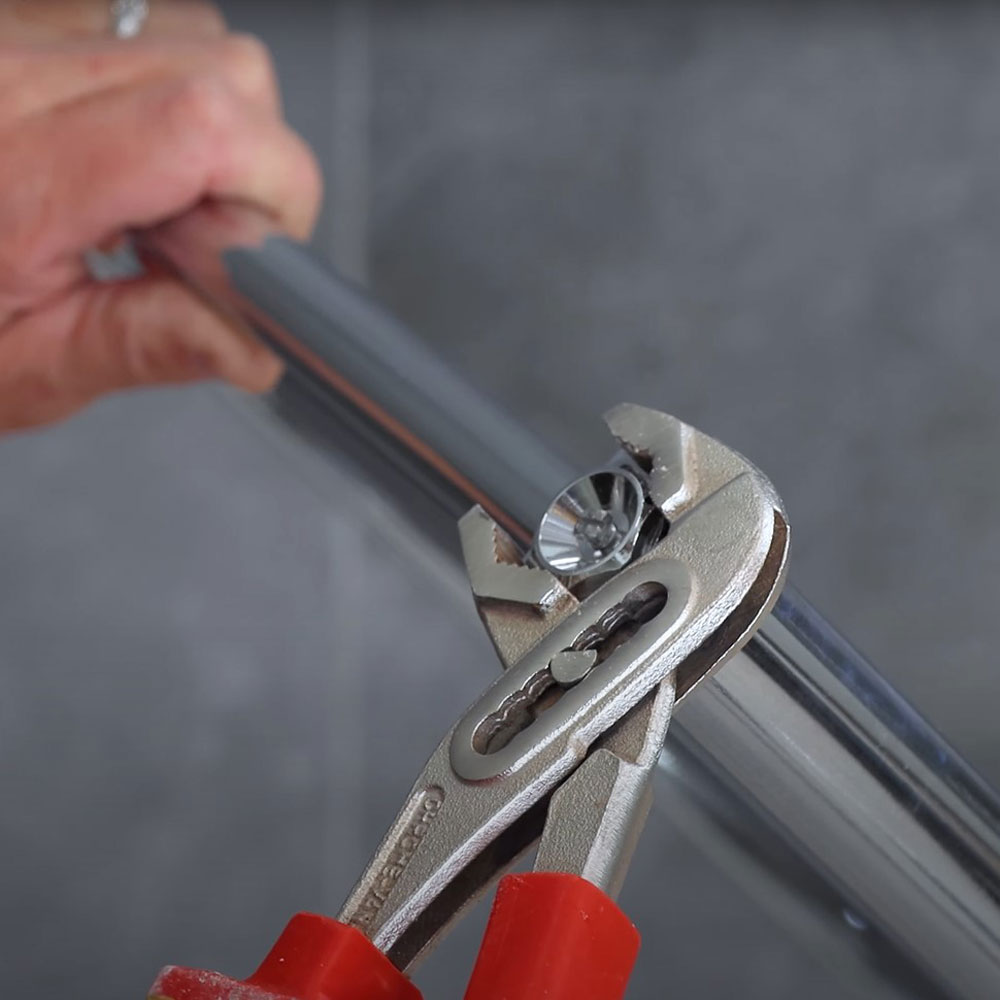
Apply some PTFE tape around the threads on the heating element and decide which side you’d like this to be on. This is normally closest to where the mains outlet will be. Screw your heating element in place by hand, tightening even further using your grips or an adjustable spanner.
2 – Filling Your Radiator
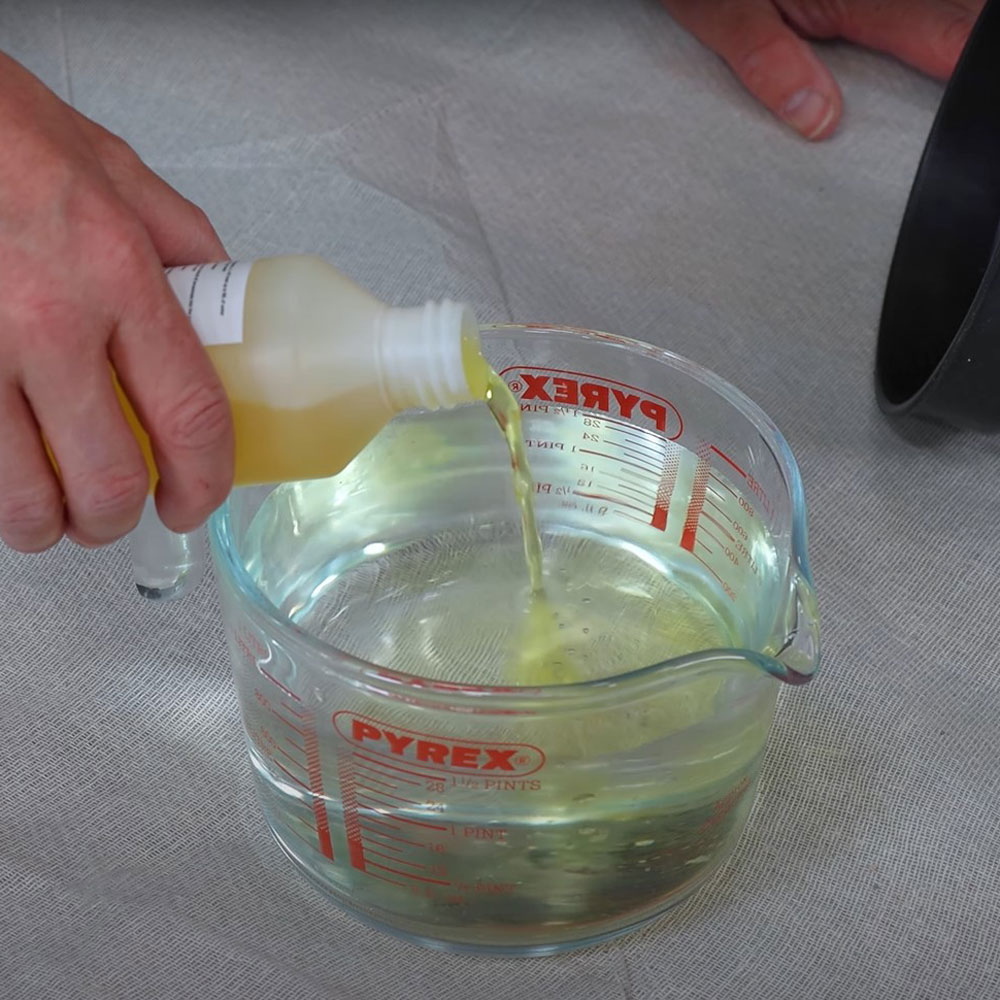
For the radiator size we are using in this tutorial we have about 1000ml of water. In this, put about 50ml of inhibitor fluid and mix together. The amount of mixture needed for your radiator depends on the size. If you’re unsure of how much mixture you’ll need for your radiator, get in contact with Bathroom Mountain, and we’ll be able to advise.
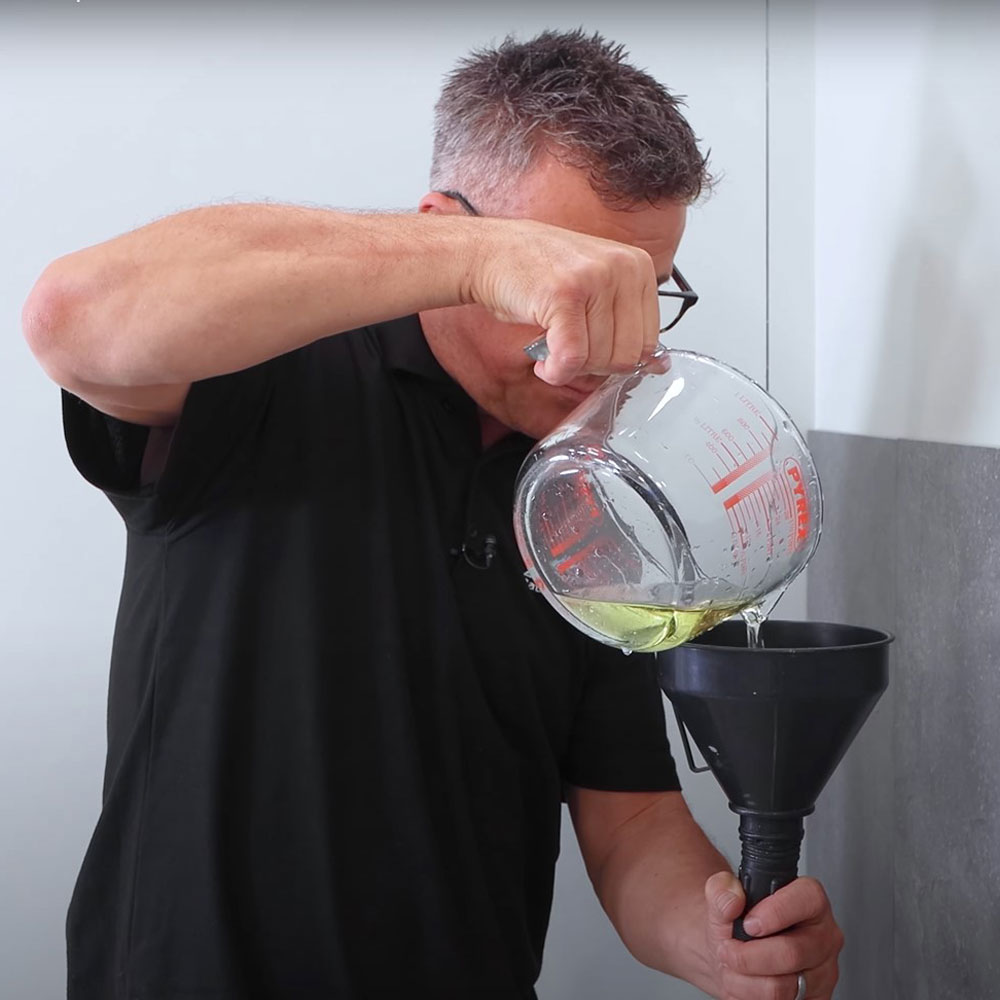
Using your funnel, fill your radiator with your mixture. Do this by pouring the mix into the corner of your radiator with no blanking plug or valve in place. This will require you to turn the radiator upside down. Don’t fill your radiator up all the way with the fluid. Leave a small amount empty.
Apply PTFE tape to your last blanking plug and screw it into place by hand, tightening even further with your grips.
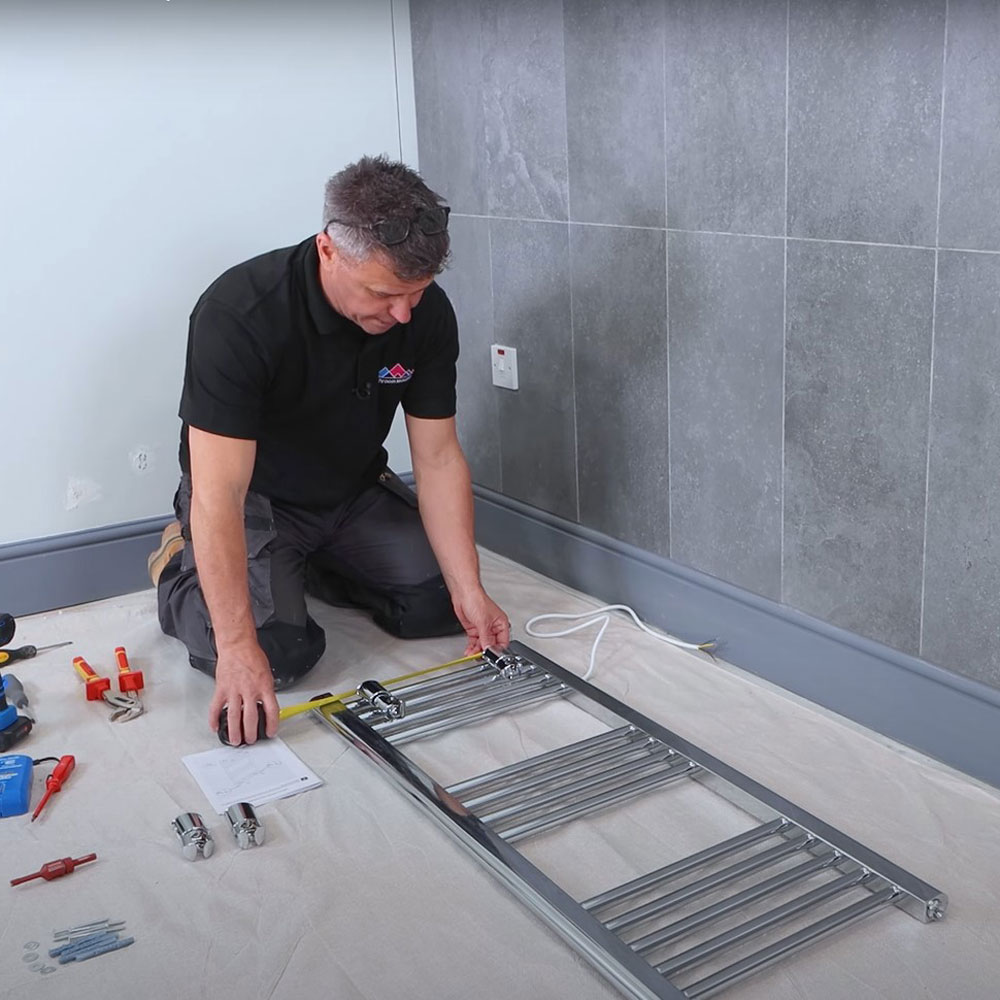
3 – Positioning your Radiator
You will typically find two brackets at the top of your radiator and two at the bottom. Check your manual for instructions if you feel this isn’t the case with your radiator. Lay your radiator flat on the floor and place your brackets where you’d like for them to be positioned. We’d recommend about 50-60mm from each edge, on the second rung from the top and bottom. Make a note of the measurement between each of these brackets.
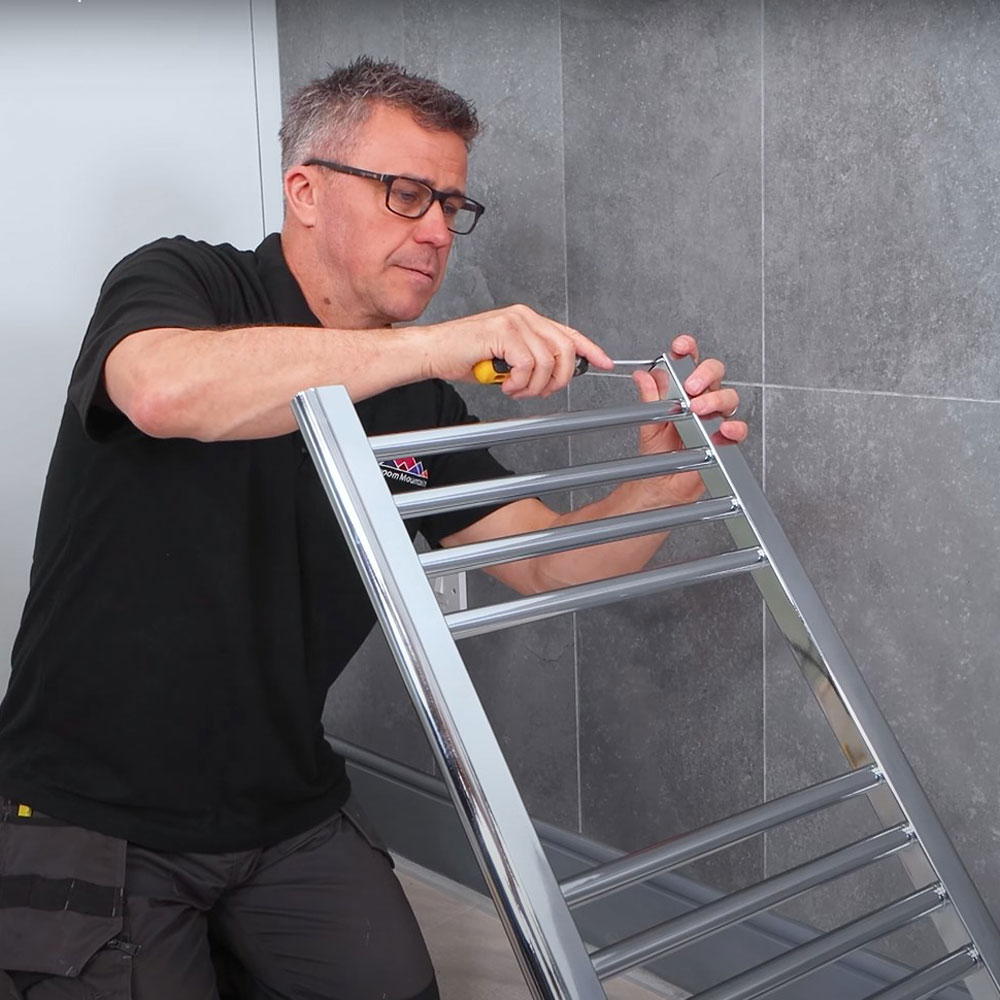
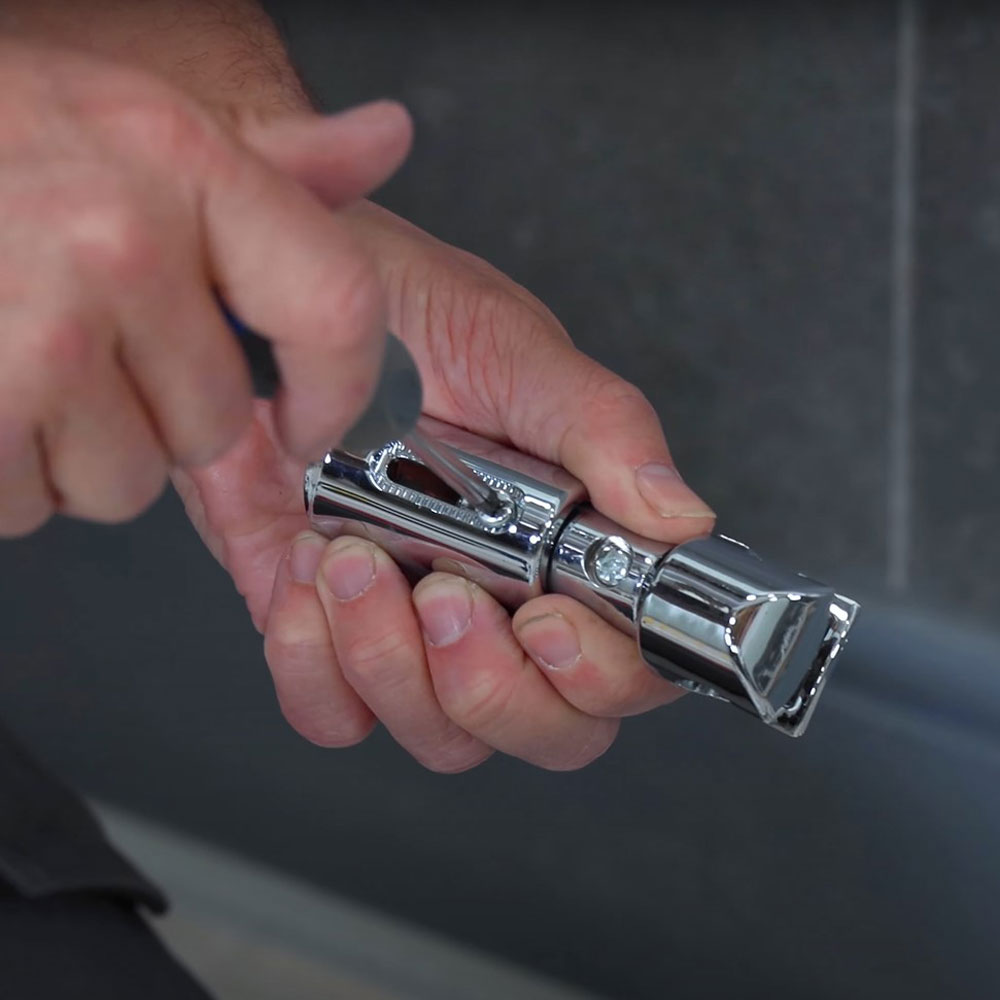
Checking your manual, find the best method for mounting your specific brackets to the wall. For this tutorial, the brackets we are using come in two parts. They are joined together when your first receive them, so start by detaching these. This can be done with a screwdriver. One of these pieces will be mounted to the wall and the other is attached to the radiator.
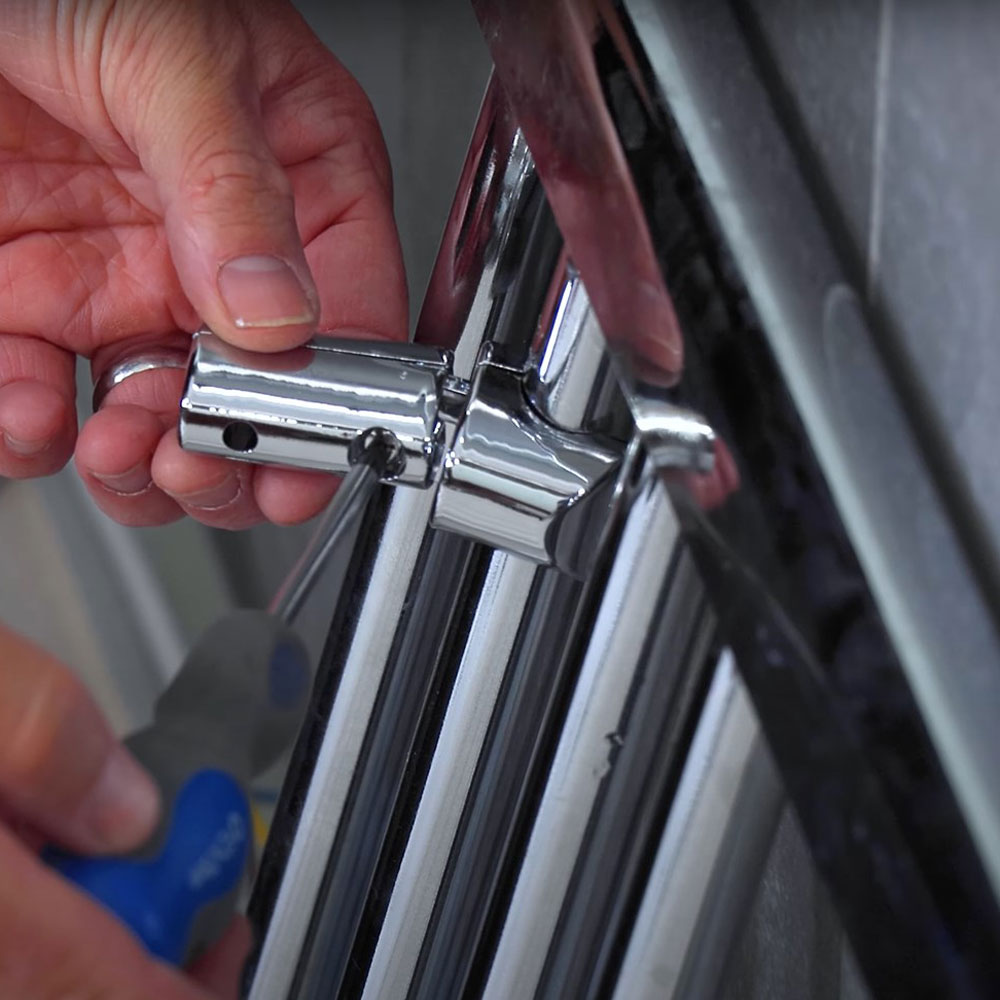
On the component that attaches to the radiator, loosen the jaws by using a screwdriver. This will allow you to place the bracket onto the rail in the position you decided on earlier. Tighten this back up in place, using your tape measure to ensure they’re in the correct position.
Do the same with the remaining brackets across the rest of your radiator. To double check all of your brackets are in the correct position, take your tape measure and measure the distance between the two top and two bottom brackets. These should match up not only with one another but also with the measurements you took earlier on. These measurements will also tell you where to drill the holes into your wall to mount the wall brackets.
4 – Mounting the Brackets Onto the Wall
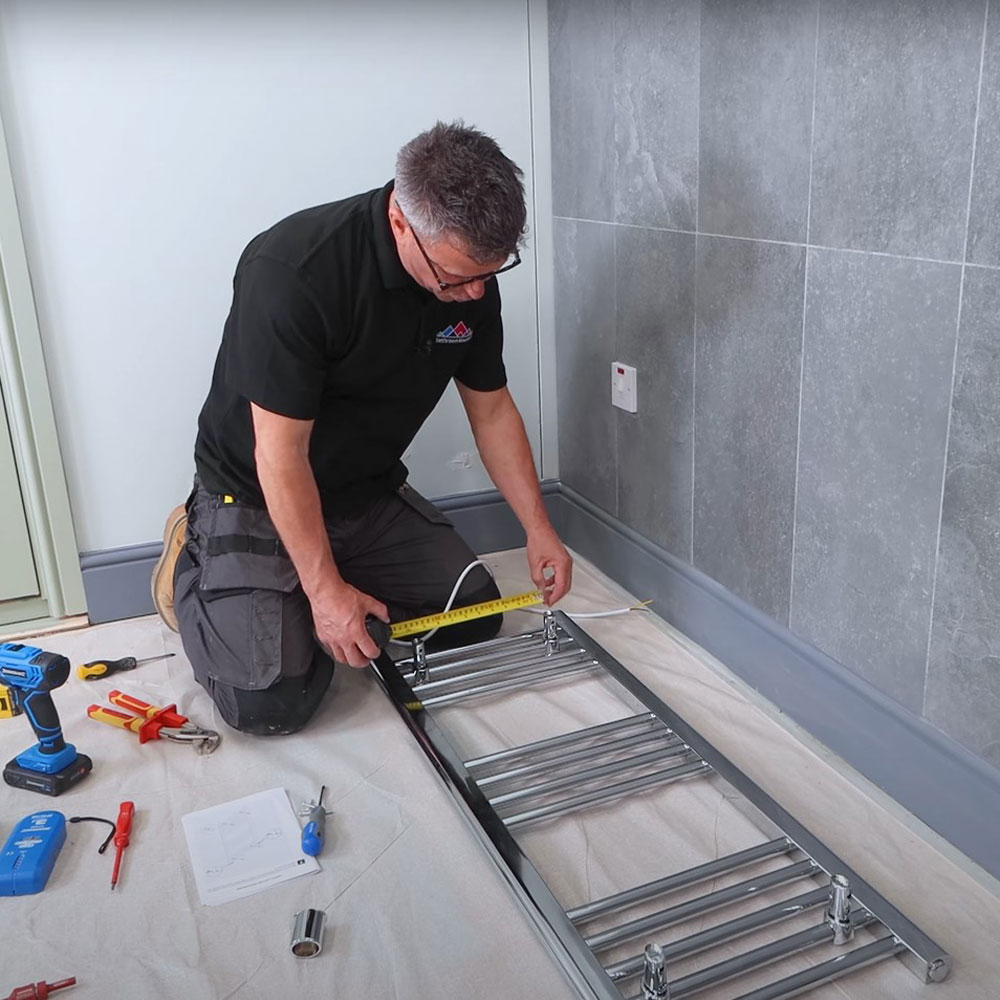
With your newly secured brackets attached to the rail, measure the distance between the top and bottom brackets. You’ll need this in a minute. Before you come to drilling any holes, use a detector to ensure you’re not drilling through any pipes or cables. Mark on the wall where you would like one of your bottom wall mounts to be placed. We’ve marked the bottom left wall bracket, closest to where our heating element sits.
With a suitable drill bit, start to drill where you made your first mark. If you’re using a drill bit with a flat end, we’d recommend starting on an angle, and when the drill begins to pierce the surface, straighten the drill up and drive through the wall.
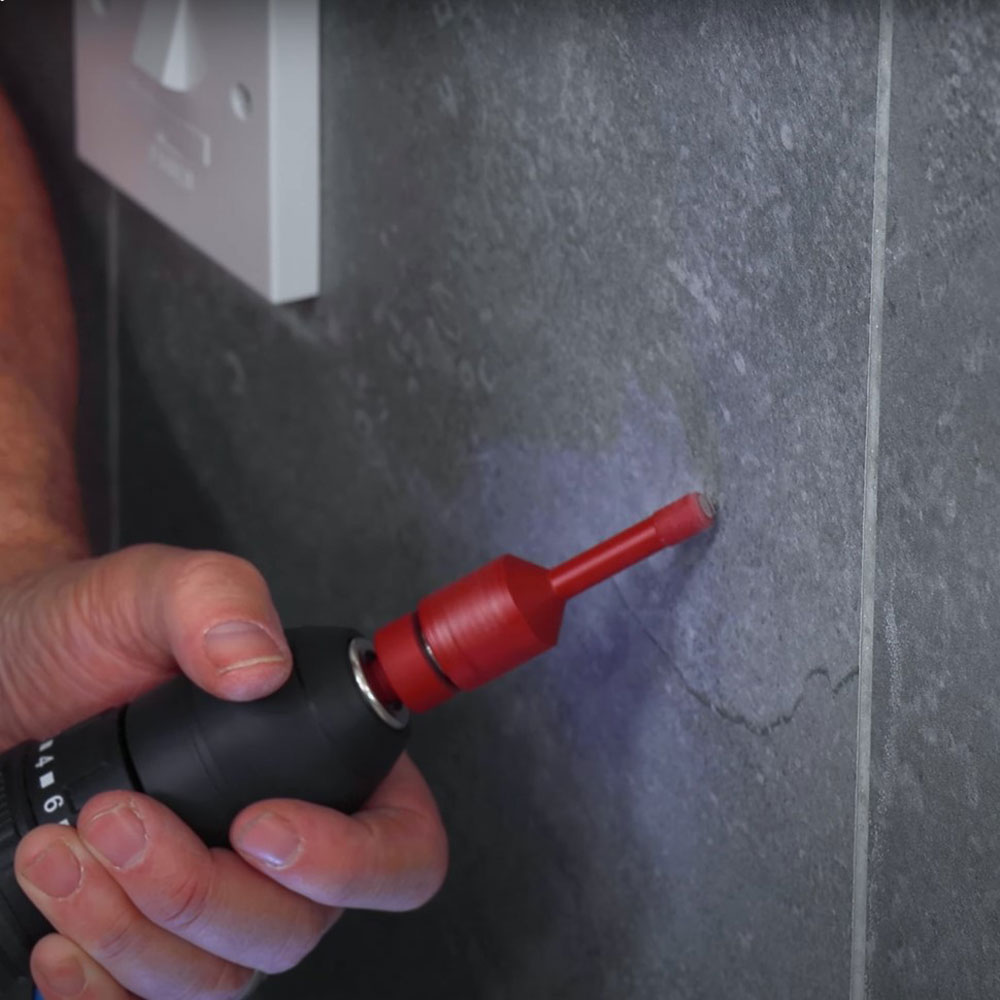
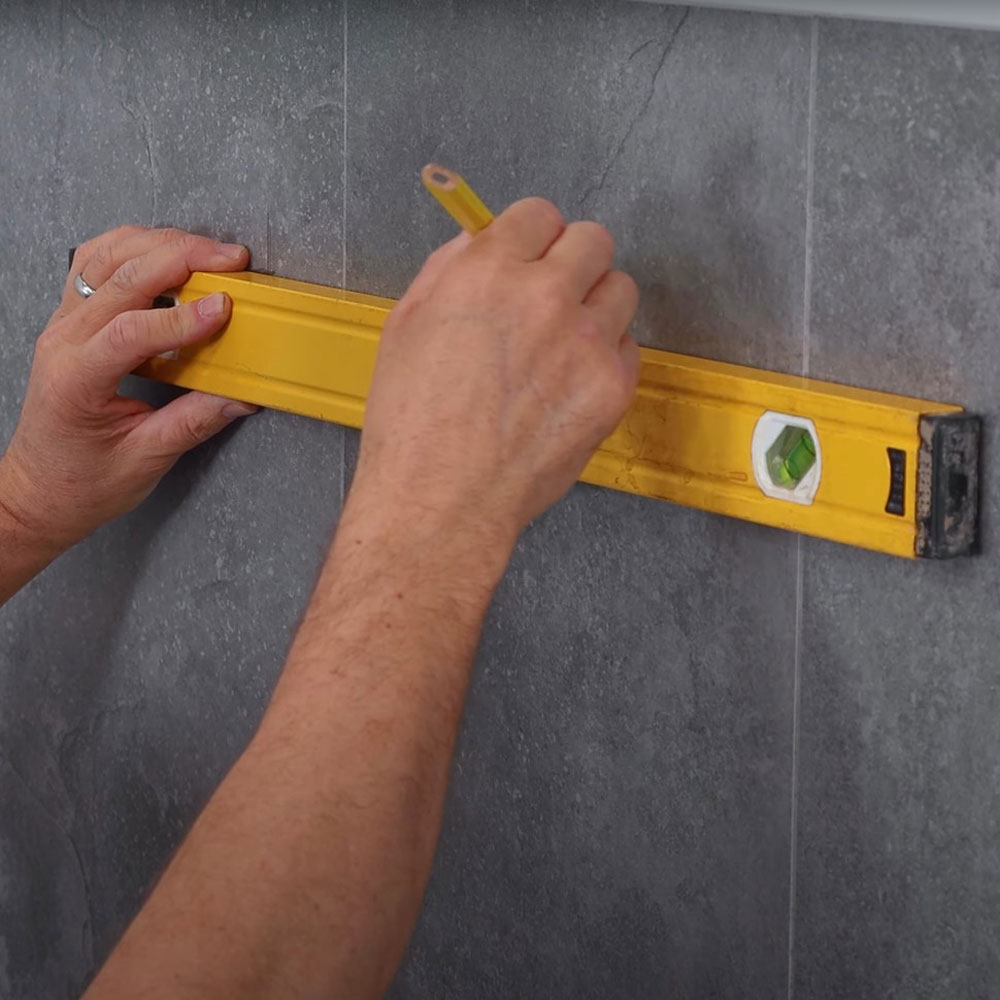
Once you’ve drilled a hole, insert a plug, securing it into place with a rubber mallet. Use your spirit level to draw a straight line from this point across to where you’ll be placing your other bracket.
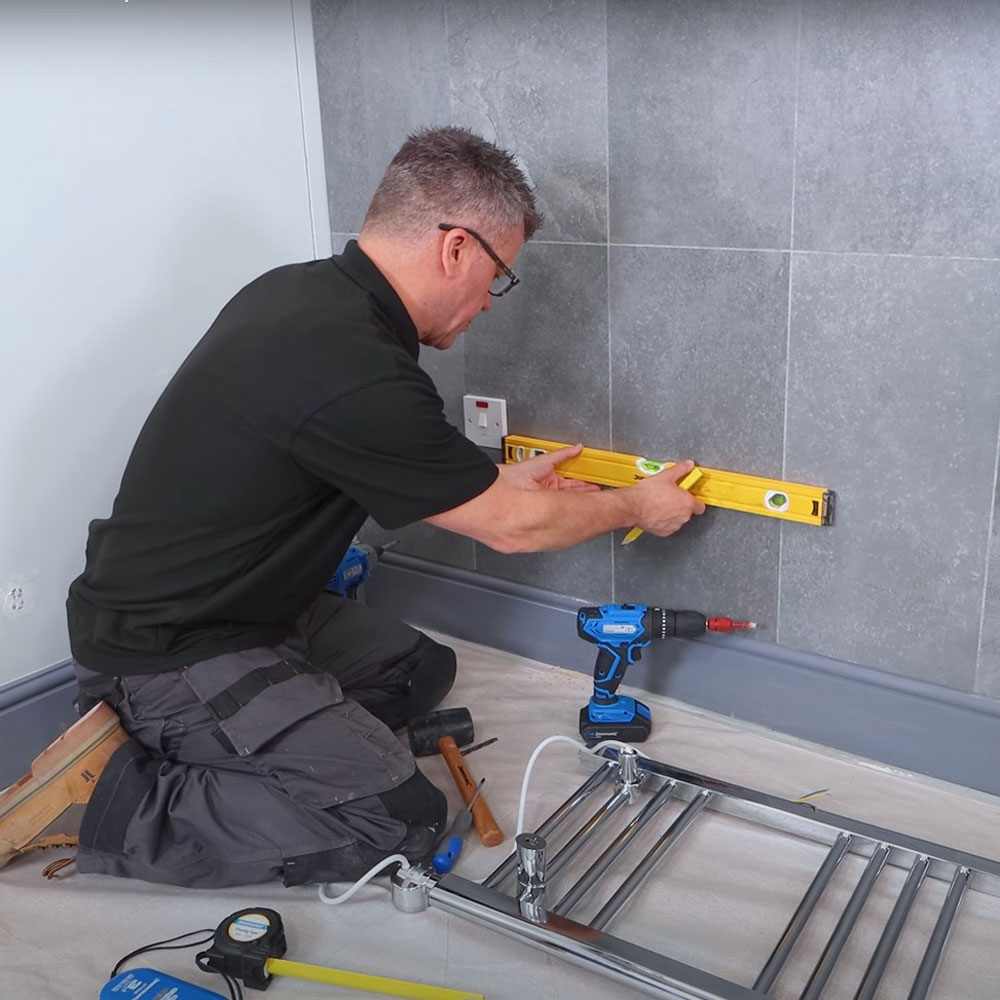
Measure the distance that you took from earlier on, between the two brackets, and mark this on the wall. Where the two points meet, drill your second hole. Now, make a mark where the measurement from earlier will sit. This is the measurement form the top brackets to the bottom ones. Use your spirit level to ensure this is straight, and repeat on both sides. Insert your plugs into all of the drilled holes.
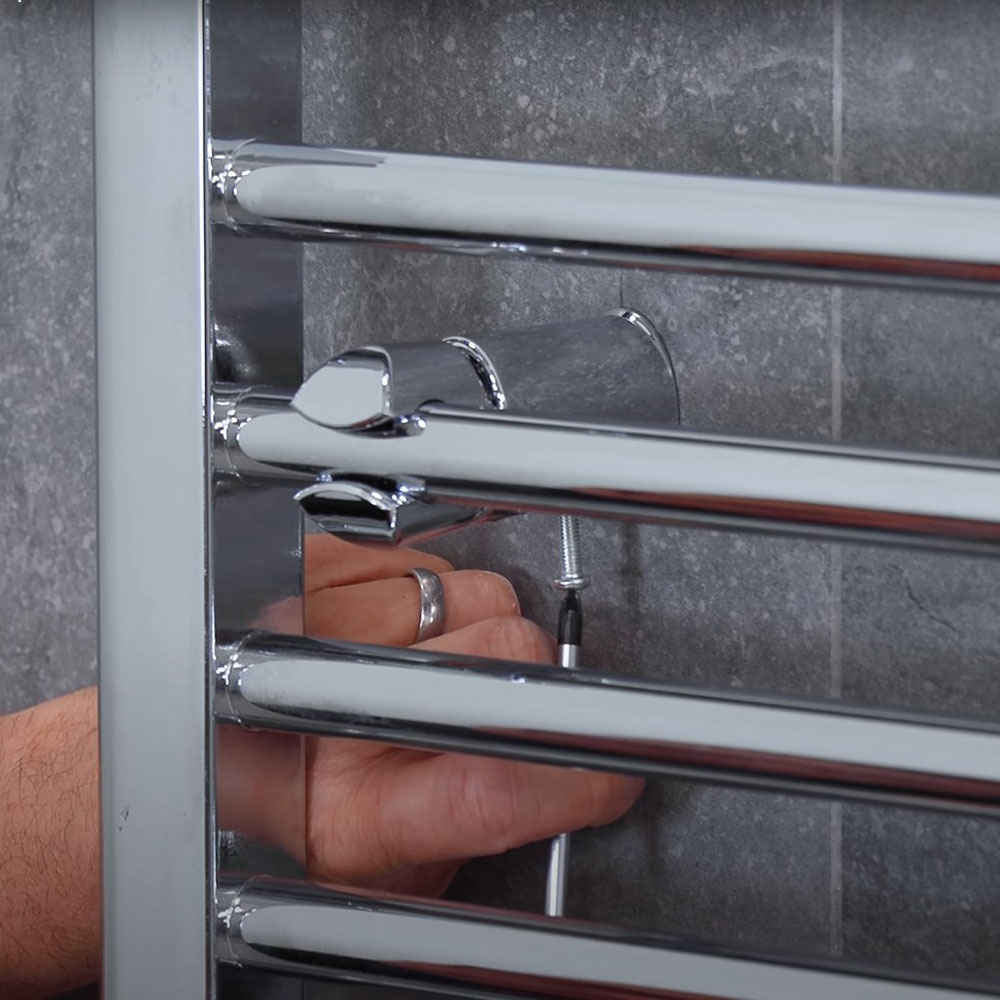
Thread your screws through the wall bracket and insert them into the plug you placed before. Tighten this by hand, and then tighten it even further using either a screwdriver or a cordless drill. Do this for all four brackets, using your spirit level to ensure this is straight.
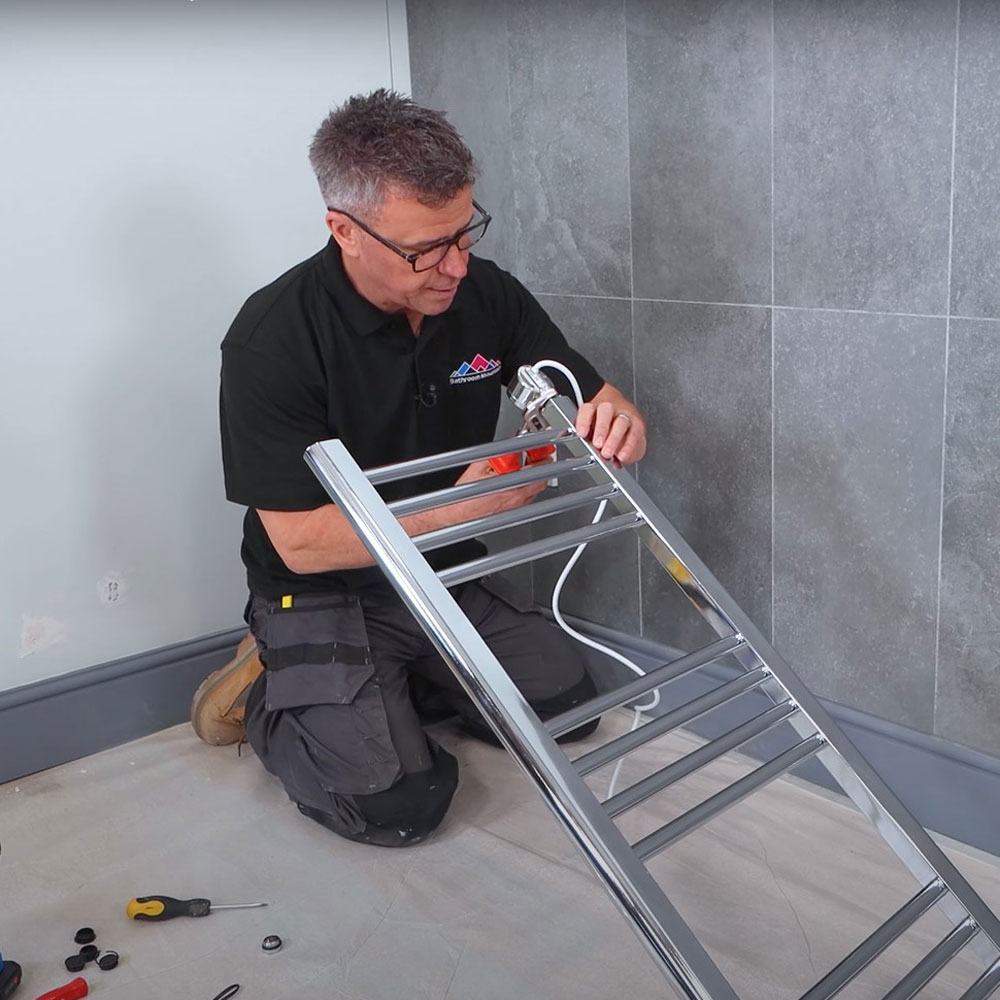
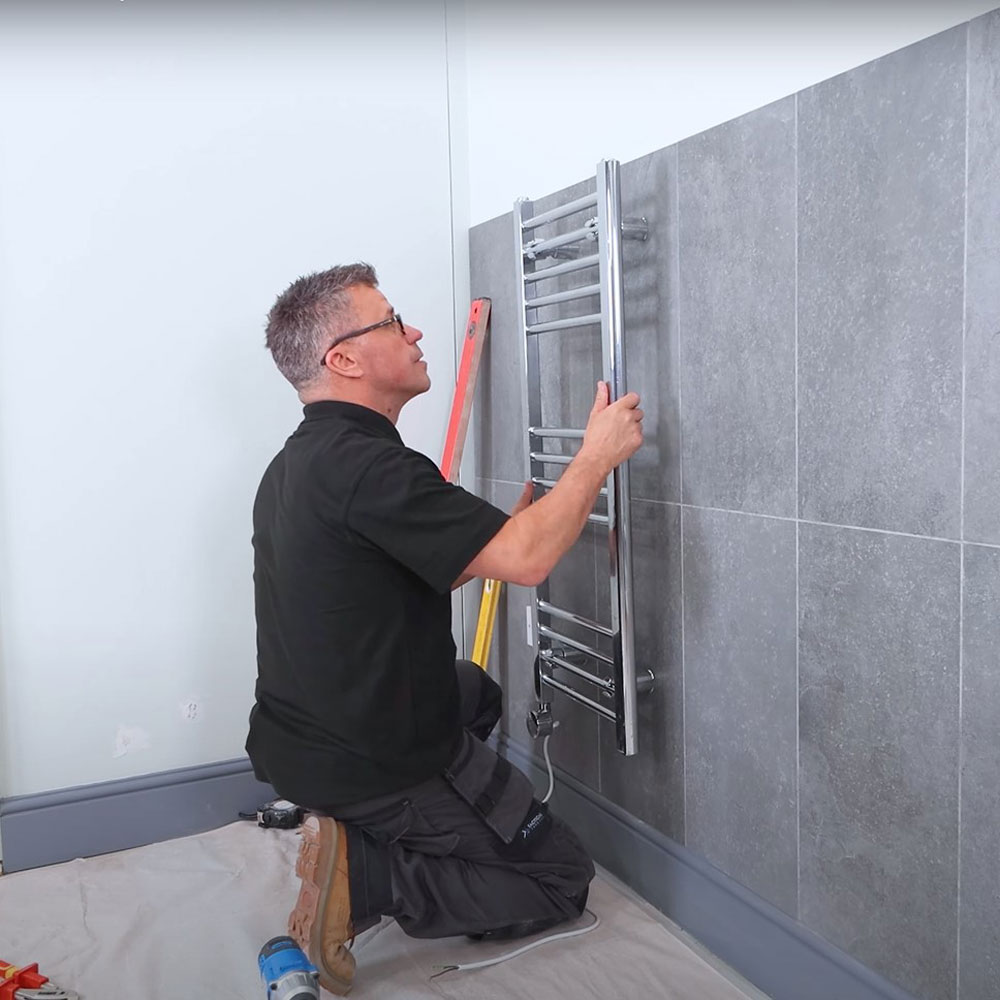
5 – Mounting your Radiator
Lift your radiator off the floor and into position on your newly mounted brackets. Tighten your wall brackets to the brackets you attached to the rail earlier with a screwdriver.
Your radiator is now fitted to the wall safely and securely. Unfortunately, for legal reasons, we cannot advise on how you connect your heating element cable to your mains. If you know how to do this, you can go ahead and do it yourself, but if you don’t, we would always recommend sourcing an electrician to do this safely.
There you have it! With the help of Bathroom Mountain and Craig Phillips, You’ve now mounted your very own electric towel rail. If you’d rather have this tutorial in video format, be sure to check out our YouTube Video. For the exact electric towel rail used in this tutorial, check out our Barcelona Electric Chrome Straight Heated Towel Rail. Don’t forget to tag us in your DIY projects on Instagram, @Bathroommountain, we love seeing what you’ve been up to!